

You might be wondering how to snip on a Mac in case you are new to macOS or switched to it recently and are on Windows. The macOS does not rely on a tool called Snipping Tool, but instead has robust built-in screenshot and screen capture capabilities that are even more fluid and professional.
This comprehensive guide will enable you to know all techniques on how to snip on Mac, starting with the easiest keyboard shortcuts and the most sophisticated screen capture features, editing programs, and third-party commercial applications. The article is entirely beginner-friendly, student-friendly, professional-friendly and content creator-friendly to achieve full control over Mac screen capture.
Table of Contents
What Does “Snip” Mean on Mac?
In macOS, a snip means a screenshot or screen capture. It may involve full display capture, selected area capture, a particular window capture, or even screen capture as a video.
The questions that users often tend to search when they want to learn how to snip on Mac are how to take screenshots, how to cut areas, how to save them, how to edit them, or how to share them fast. All that can be done with inbuilt macOS tools, without any additional software.
How to Snip on Mac Using Keyboard Shortcuts
Snipping the Entire Screen
To take a snapshot of all that you see on your Mac screen press:
Command + Shift + 3
This automatically creates a screenshot of your entire screen and places it on your desktop (or wherever you want to save it). This technique is best suited to the capture of entire web pages, error messages, or computer interfaces.
Snipping a Selected Area
To select a particular part of your screen, press:
Command + Shift + 4
Your cursor will become a crosshair. You can move it on the field of snipe. It is among the most popular Mac screenshot shortcuts and is ideal when making a tutorial, a blog image, or a presentation.
Snipping a Specific Window
To take one window with sharp edges and shadow effects, press:
Control + Shift + 4, followed by Spacebar.
Your cursor will turn into a camera icon. Click on any open window to snipe it cleanly. This technique is common in software documentation and UI demonstrations.
Using the Screenshot Toolbar on Mac
Opening the Screenshot Toolbar
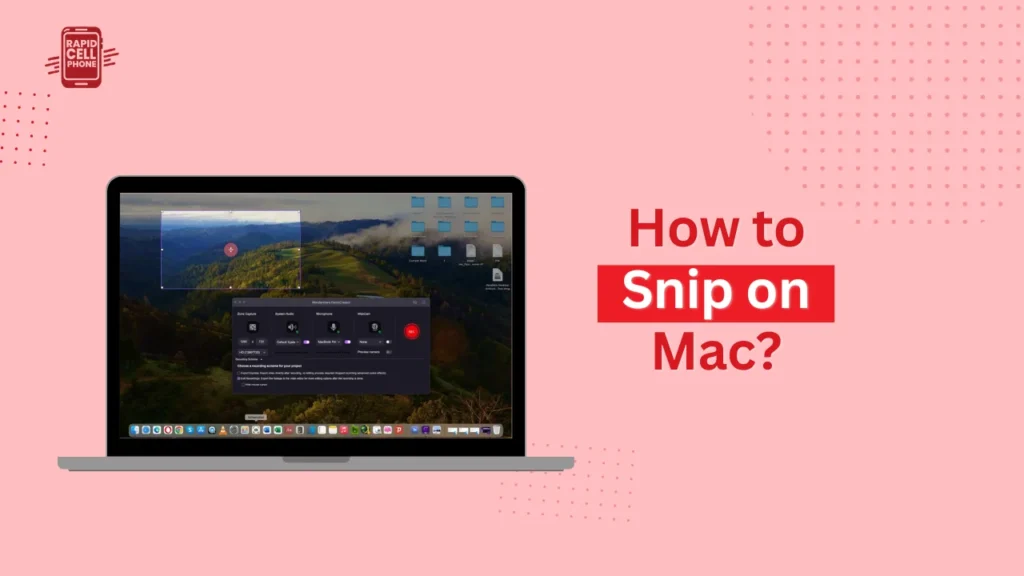
Screenshot Toolbar is the most developed inbuilt screen capturing tool on macOS. You can open it by pressing:
Command + Shift + 5
This toolbar is located at the bottom of the screen and offers every control of the way you snip on Mac.
Features of the Screenshot Toolbar
Using the toolbar, you can take a snapshot of the whole screen, a window, or a personalized area. It also allows screen recording, which can be applied in making tutorials, demos, and online courses. You have the option to use a timer to capture, decide on the location of the screen shots and determine whether the floating thumbnail should be visible or not after the capture.
This is particularly handy when you are new to it since it displays visual buttons rather than using shortcuts based on the keyboard.
How to Copy Snips to Clipboard Instead of Saving
There are occasions when you can desire to copy a screen shot directly to an email or document or chat without having to save it like a file. To achieve this, press any screenshot shortcut with the Control key.
For example:
Control + Command + Shift + 4
This transfers the snip to your clipboard to be immediately copied into Word, Google Docs, WhatsApp Web, Slack, or any other design tool.
Editing Screenshots Using the Preview App
Once you have made a snip you can go ahead and draw a Click on the floating thumbnail which appears in the corner of your screen. This opens the picture in the Markup editor or the Preview app.
Editing Features in Preview
Preview lets you crop the image, draw shapes, add arrows, insert text, blur sensitive information, and highlight important parts. Colors and brightness can also be adjusted. This is what makes Preview a fully featured inbuilt screenshot editor in the macOs users, particularly in legal, training, and business presentations.
Where Do Screenshots Save on Mac?
MacOS automatically stores any screen shot on the Desktop. But you can alter this place whenever you like.
To access the Screenshot Toolbar, press Command + Shift + 5, then go to the Options and select a new place to save your screenshot, Documents, Pictures or any other folder that you want. This will keep your workflow tidy, particularly when you make numerous screenshots in a day.
Best Third-Party Snipping Tools for Mac
Zight (Cloud-Based Screen Capture)
Zight is one of the most popular professional applications enabling you to take screen shots and videos, annotate them and share them on-the-fly, using cloud links. It is perfect among teams, customer care solutions, and content creators who require quick sharing and teamwork capacities.
CleanShot X for Advanced Users
CleanShot X is a high-quality tool which provides scrolling screenshots, background remover, advanced annotation and screen recording. Designers, developers, and bloggers all make huge use of it as they need high-quality visual content.
Lightshot for Quick Snips
Lightshot is a free and lightweight alternative that emphasizes rapid region capture and easy editing. Users who do not need complex features and want speed use it.
Common Issues While Snipping on Mac and Their Solutions
Sometimes the screenshots might not save, shortcuts can fail to work or the files can appear in a different location. These problems are often brought about by permission settings, storage space, or modified keyboard shortcuts.
Most of the issues can be resolved by viewing the screenshow shortcuts in System settings under the Keyboard, checking the disk space, and by changing the default save location using the Screenshot Toolbar.
Advanced Tips to Master Snipping on Mac
Users who are professionals will normally use more sophisticated features like holding the Spacebar when choosing the area to reposition it, pressing the Shift key to lock sizes and directly copy screen shots to the clipboard so that they can be immediately pasted. The addition of touch bar screenshot control and Markup tools of Preview will enhance productivity and presentation quality.
Conclusion
Learning how to snip on Mac is vital to students, professionals, developers, designers, and creators of content because Mac OS has strong built-in screenshots to capture full screens, selected regions and windows, screen recordings, image editing and share them instantly.
The Screenshot Toolbar, Preview editor and the advanced keyboard shortcuts allow you to do virtually any screen capture operation without requiring any further software. To provide users with features of a professional level, there are third-party applications such as Zight and CleanShot X, which allow greater flexibility and control.
Learning these techniques, you are able to convert your Mac into an in-full screen capture and graphic documentation system.
FAQs About How to Snip on Mac?
How do I snip a selected area on Mac?
Press Command + Shift + 4 to snip a particular section of your screen. Your cursor will become a crosshair. Drag it on the region you wish to capture and release to capture the screenshot. This is the quickest method of snipping a section of the screen on the macOS.
Is there a snipping tool on Mac like Windows?
There is no Snipping Tool in Mac but it has the inbuilt Screenshot Toolbar that is even better. You may open it by clicking Command + Shift + 5 that enables you to take a snapshot of the whole screen, a window, a selected area, or even record your screen.
Where do snips save on Mac?
Screenshots are automatically saved to Desktop. To change the save location, press Command + Shift + 5, click on Options and choose a different folder like Documents or Pictures.
How can I copy a snip instead of saving it?
When taking a screenshot, hold the Control (⌃) key. As an example, to copy what was selected to your clipboard to be pasted in an email, document or chat, press Control + Command + Shift + 4.
How do I snip a single window on Mac?
Press Command + Shift + 4 and press Spacebar. You will see your cursor change into an icon of a camera. Click a window to capture it and macOS will save a clean image of the window.
0 Comments